Introducing PercyScript: The easiest way to get started with visual testing

We believe that visual tests are the lowest-effort, highest-value tests you can write. Giving your team full confidence in the UI that your users see and interact with every day is invaluable — and helping more teams unlock that value is a big part of our mission at Percy.
To make visual testing more accessible, we introduced our free plan (and cheaper plans) this year. We’ve also invested a lot in building new SDKs to support for more web app frameworks, end-to-end testing frameworks, component libraries, and static sites.
But we wanted a way that people could get started with visual testing in minutes, without having to build on top of an existing test suite or framework. We wanted a way to test anything that runs in a browser.
Our newest SDK, PercyScript, does exactly that, making it easier than ever to get started with visual testing.
How it works
With PercyScript you can add visual testing to anything that runs in a browser, including live URLs. You can get up and running with PercyScript in just a few minutes, and with just a few lines of JavaScript.
Here is a fully-working PercyScript:
This script opens a browser, visits a local app, takes a snapshot, and sends it up to Percy for visual testing.
PercyScript can be as simple or advanced as you make it. It uses Google Puppeteer underneath, which means PercyScript can fully interact with elements by clicking, typing, waiting, etc.
In the rest of this post, we’ll show you how to install and configure PercyScript with a TodoMVC example app, but you can also follow along to add PercyScript to your own application. Then we’ll make some visual changes and run our first visual review.
Step 1: Install and configure PercyScript
Note: Node.js and git are required for this tutorial
First, let’s set up our example app:
$ git clone https://github.com/percy/example-todomvc.git
$ cd example-todomvc/
$ npm install
$ npm run start
You can now visit http://localhost:8000 and play around with the todos app yourself.
Next, we’re going to install PercyScript and write our first visual tests for this application.
Keep the server running, and open a new terminal to run:
$ npm install -D @percy/script
This will add @percy/script to your package.json file.
Next, create a file named snapshots.js and add your first PercyScript:
That’s it! 🎉
The next step is to start running this PercyScript and seeing visual changes.
Step 2: Run visual tests
If you haven’t already, sign up for a Percy account, name your organization, and create your first project.
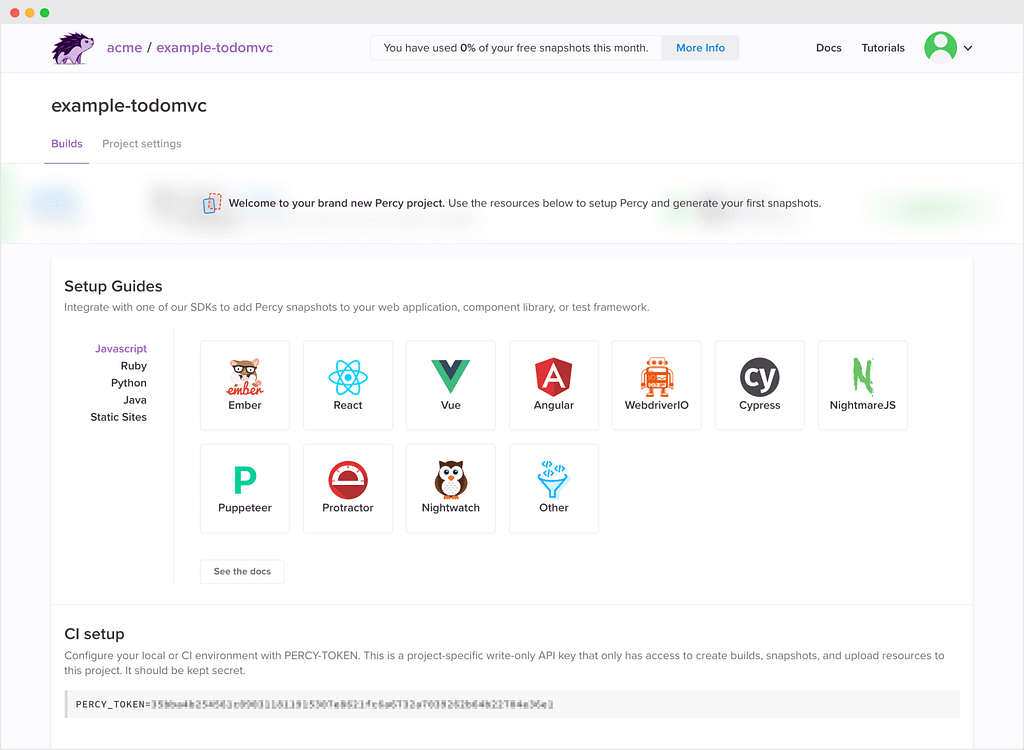
Note: Signing up for a Percy account will kick off a 14-day trial, but once that expires, you’ll be transferred to our free plan which includes 5,000 free snapshots each month.
Percy is designed to run alongside your CI builds, but for this tutorial, we’re going to run PercyScript locally. Copy the PERCY_TOKEN environment variable from the new project screen or your project settings, then run:
$ export PERCY_TOKEN=aaabbbcccdddeee
$ npx percy exec —- node snapshots.js
# Or if you're using Windows:
$ set PERCY_TOKEN=aaabbbcccdddeee
$ npx percy exec —- node snapshots.js
Note: Replace the token with your project-specific PERCY_TOKEN.
You should see output like:
$ npx percy exec —- node snapshots.js
[percy] created build #1: https://percy.io/test/example-todomvc/builds/1738842
[percy] percy has started.
[percy] snapshot taken: ‘TodoMVC home page’
[percy] snapshot taken: ‘TodoMVC with a new todo’
[percy] stopping percy…
[percy] waiting for 2 snapshots to complete…
[percy] done.
[percy] finalized build #1: https://percy.io/test/example-todomvc/builds/1738842
What’s happening behind the scenes? Percy works by capturing the DOM snapshot everywhere the Percy snapshot command is called. We then recreate the page or component in our custom rendering environment. New snapshots are compared against baseline snapshots to determine which pixels have changed.
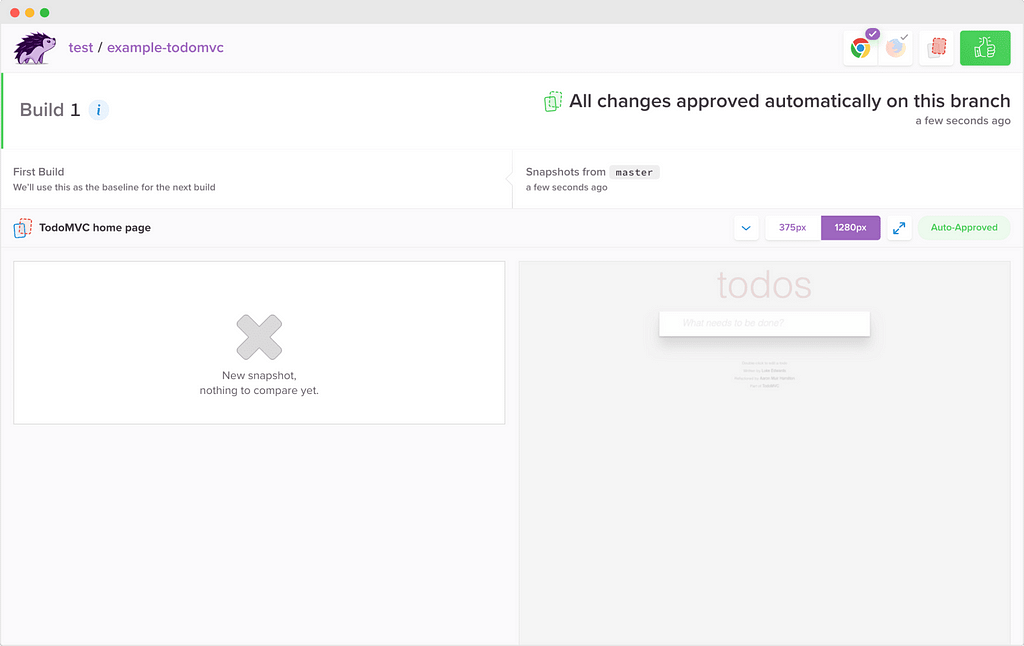
You’ll see that since this is the first build, there isn’t anything to compare it to. It has also been “auto-approved” because the commit was on master and we assume that master builds are production-ready.
Now that you’re integrated and have pushed your first build establishing your baseline, let’s make a change and review the outcome in Percy!
Step 3: Make and review visual changes
Let’s make a new feature branch and introduce a visual change.
Use your text editor to edit index.html and make the h1 text on line 11 purple:
<h1 style="color:#9e66bf;">
Now run the snapshots again:
$ npx percy exec —- node snapshots.js
Head back to Percy or click the Percy build link to see the visual changes.
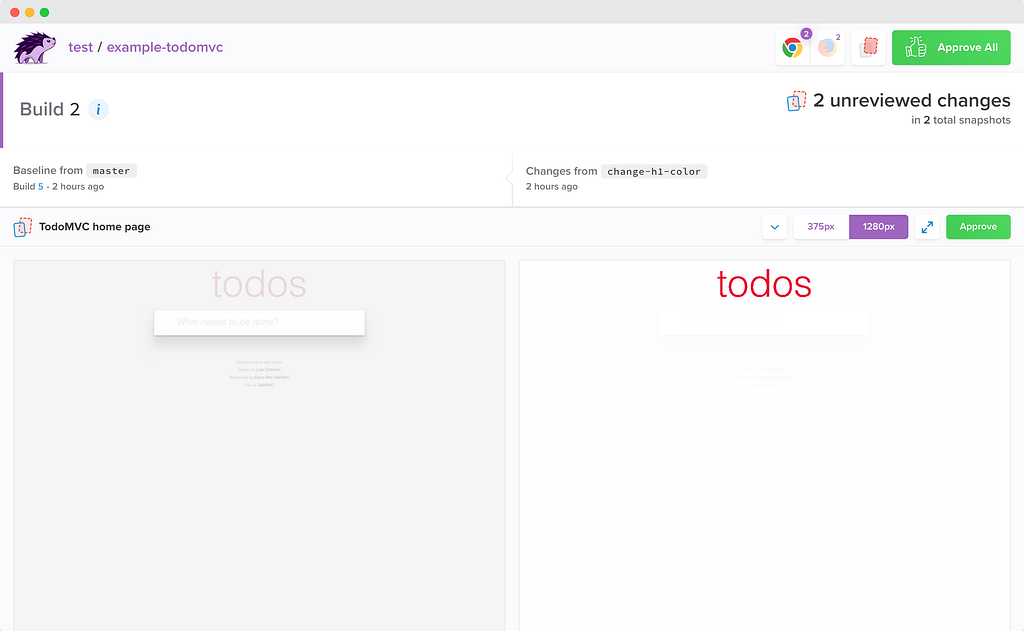
You’ve done your first visual review!
You can use PercyScript in the same way with anything on the web. We’re excited to add this new SDK to Percy and make it even easier to get started with visual testing.
Ready to integrate Percy into your own workflow?
- Check out the PercyScript documentation and tutorial
- Learn more about Percy’s visual review workflow with CI
- Read about adding a source code integration
Percy is an all-in-one visual testing solution that gives your team confidence in every visual change before it’s shipped. Learn more at https://percy.io. 🕵️♀️
<hr><p>Introducing PercyScript: the easiest way to get started with visual testing was originally published in Percy Blog on Medium, where people are continuing the conversation by highlighting and responding to this story.</p>